For instructions on syncing with nearby devices over Wi-Fi, see the Nearby Sync topic. For instructions on syncing with iCloud, see the iCloud Sync chapter. For instructions on setting up your own Apache CouchDB sync server, see Apache CouchDB Sync.
IBM Cloud syncing is very useful if you want to sync with someone who does not share the same Apple ID as you on their devices.
Here are the steps you need to do to create an IBM Cloud account and to add Cloudant as a service into your account. You’ll need to do this first before you setup Tap Forms with your username and password given to you by IBM Cloud now.
Visit https://console.bluemix.net/catalog/services/cloudant-nosql-db to create your account.
- Scroll down to Pricing Plans.
- Select a pricing plan. Try the free Lite service first to see if that works for you. If your storage requirements are higher than 1 GB, then you may need to select the Standard plan, but there will be a fee for that. If you’re not comfortable with that, then you can certainly use one of the other built-in sync solutions in Tap Forms.
- Click on the blue
Sign Up to Createbutton on the right. - In the
Emailfield, enter your email address, and then press the tab key. - Enter your remaining details including a password that you will use to login to your IBM account on their website. You will not be asked to type your password in again. Please remember it. Also please note this is NOT the same password you use to Sign In to Cloudant within Tap Forms. That will be issued to you later on.
- Click the
Create Accountbutton. You will be asked to check your email to verify your email address. - Look for an email in your email account titled:
Action required: Confirm your IBM Cloud account. - Click the blue
Confirm Accountbutton. - You should see a Success! screen.
- Click the Login button to proceed.
- Enter your login email address and password when prompted.
- View the welcome splash screen and click the Next button or click the X button to close it.
- You should see the Cloudant NoSQL page.
- Click the blue
Createbutton at the bottom-right of the web page. - Click
Service credentialson the left where it says Manage, Service Credentials, Plan and Connections. - Click the blue
New Credentialbutton on the right. - Accept the default name and then click the blue
Addbutton. - Click the dropdown arrow next to
View Credentialsand copy theusernameandpasswordvalues. These are theuser nameandpasswordvalues you will need to enter into Tap Forms in the next step. For example, a username is similar to this:username:7891234-qll3-lk92-woiu4-da0d345tg7b5-bluemix. - Now click
Manageat the top-left side of the page. - Click the
Launchbutton if you wish to view your Cloudant dashboard. This is where you can see your databases that you’re syncing with Tap Forms once you’ve signed in to your IBM Cloud account within Tap Forms.
Once you have your own IBM Cloud Cloudant service setup, you need to return to Tap Forms and then:
- Open the database document you would like to sync.
- Under the Tap Forms menu, select Preferences. On iOS, go to the Tools area then tap on Sync Settings.
- Click
Sync. - Click
Cloudant. - Copy the
usernamevalue given to you from theService Credentialsin your IBM Cloud account. - Paste the
usernamevalue given to you into the Tap FormsUsernamefield. When you paste in your username, the server address will automatically be entered for you. - Copy the
passwordvalue given to you from theService Credentialsin your IBM Cloud account and paste it into thePasswordfield in Tap Forms. - Enable Auto-Sync if you wish to have Tap Forms sync your data automatically.
- Click the
Sign Inbutton when you’re done.
Auto-Sync
If you enable Auto-Sync, Tap Forms will sync with Cloudant automatically whenever you make changes. Any other device which is also running Tap Forms at that time will receive any changes you’ve made a few moments later. If no other devices are running Tap Forms at that moment, the next time you launch Tap Forms on those other devices, they will check Cloudant for any changes and will sync. If they have changes that have not yet been synced to Cloudant, those changes will also be automatically synced.
If you’re not using Auto-Sync, select the Sync Now command from the File menu whenever you want to sync your document.
Database Sharing
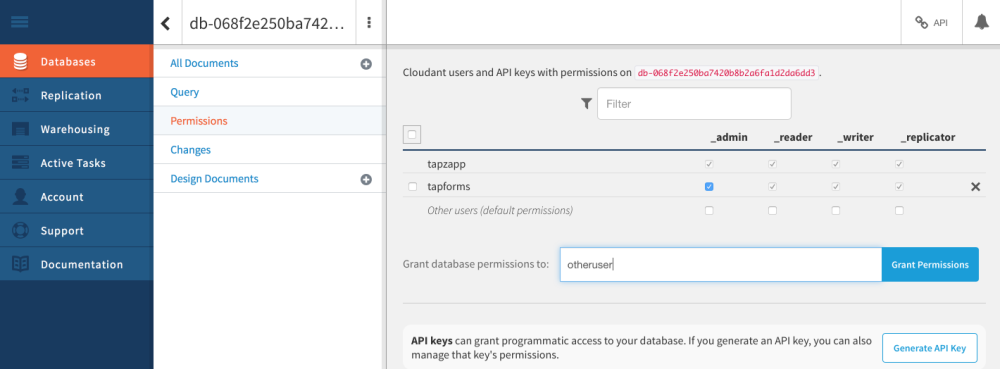
Cloudant has the ability to let you share a database with another Cloudant user. Tap Forms supports this via the Shared by user setting on the cloud Sync Settings screen. Once you’ve setup database sharing and granted the other Cloudant user access to your database, the other user will need to enter your username into the Shared by user setting in Tap Forms. They also need to enter their own username and password into the appropriate fields. Once they’ve done this, any changes they make to their copy of the database will be synced with your copy of the database and vice versa.
Need more help with this?
Don’t hesitate to contact us here.


